Add images, icons, and library assets
Open Assets in the Designer sidebar when the design needs artwork, symbols, or a reusable game component. Choose Game, Icons, or Library to change the source. You can browse and select an item before deciding where it belongs in the design.
There are three ways to insert most assets:
- Drag an item onto the physical piece to choose its starting position.
- Double-click an item to add it at the last pointer position on the piece, or in the centre when there is no recent pointer position.
- Select an item with the keyboard and press
EnterorSpace.
On a touch screen, tap a selected icon or Library item again to insert it. A single click selects an item; it does not insert it. Sources that provide more information show the selected item's details. Dropping outside the physical piece does not add a layer.
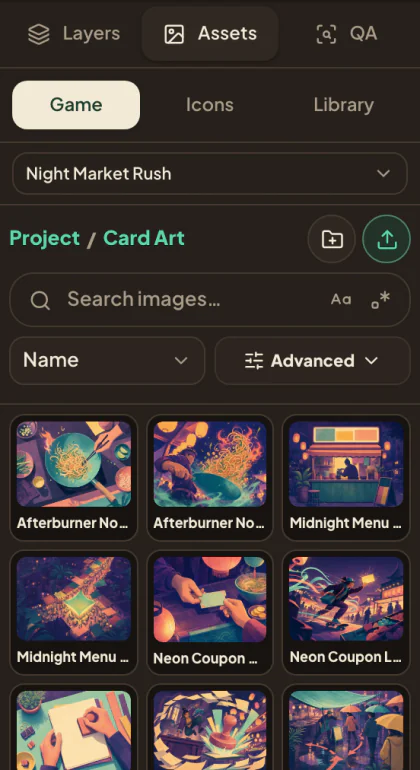
Use images from the game
The Game tab shows images already stored in the current game. Search image names, open folders, change the sort order, or use the advanced search controls. If you can edit the game, you can also create folders and upload artwork without leaving the Designer.
To add an image:
- Find the image in Assets → Game.
- Drag it onto the physical piece, double-click it, or focus it and press
EnterorSpace. - Select the new image layer to set its size, crop, fit, corners, bindings, and effects.
Dragging gives you control over the starting position. The other insertion methods place the image in the design so you can position it afterwards.
Uploading an image only adds it to the game's Assets library. Double-click, use the keyboard, or drag the finished upload onto the piece when you also want it in the current design.
Drop onto an existing layer
The result depends on what is under the pointer when you release the image:
Empty space, text, or a shape
Studio creates a new image layer at the drop position. The existing text, shape, or other non-image layer is unchanged.
An ordinary image layer
Studio asks Replace image? and names both the layer and the new image. Choose Replace to keep the same layer, position, size, and rotation while changing its source. Studio clears the previous crop and applies the new source's fit, effects, and provenance. Choose Cancel to leave the layer unchanged.
Drop onto empty space instead when both images should remain as separate layers.
A data-bound image layer
Studio does not silently remove the binding. It asks Place image on bound layer? and offers three choices:
- Replace current row binding keeps the binding and changes the image column's value for the selected dataset row only, so other rows continue using their own values. This changes game data, not only the appearance of the current layer, so check the row and image column first.
- Replace for all rows removes the binding and uses the dropped image for every row.
- Insert as new layer leaves the bound layer unchanged and adds the image above it.
If Studio cannot resolve the bound image field for the current row, Replace current row binding is unavailable and explains why. Select a dataset row or correct the layer's image binding to use it. Choose Cancel to leave everything unchanged.
An icon
Icons always create a new image layer, even when dropped over another image. This prevents a decorative symbol from unexpectedly replacing artwork or a dataset value.
Drop an image from your computer
You can drag a supported local image file directly onto the physical piece. Studio immediately places a temporary image layer at the drop position while it uploads and processes the file.
- When processing succeeds, the same layer switches to the stored game image.
- When processing fails, Studio removes the temporary layer so a broken placeholder is not left in the design.
- You can drop a batch of valid images; each one receives its own pending layer and result.
The full Assets guide explains uploads, folders, image editing, usage checks, and safe deletion.
Use an image from another game
The game selector at the top of Assets → Game lists Other games that you own, and the same games appear as folders at the top level of the current game's images. Games shared with you are not listed in this compact Designer selector.
Select an owned source game and find its image. Double-clicking, using the keyboard, dragging the image, or choosing Use selected image opens a choice before anything is added:
- Link live image keeps a connection to the source. Later source changes appear in the current game, but the image also depends on continued access to that source.
- Duplicate into this project prepares an independent copy in the current game. Use this when the game needs its own version or a self-contained archive. Copying can take a moment before the new layer appears.
When you drag a cross-game image, Studio remembers the intended drop position or target while you make this choice. If the target is an existing image, the normal replacement confirmation follows after the link or copy is ready.
The source image must be available and fully processed. A linked image cannot be linked again from its destination; open the original game when you need to reuse that source elsewhere.
Add an icon
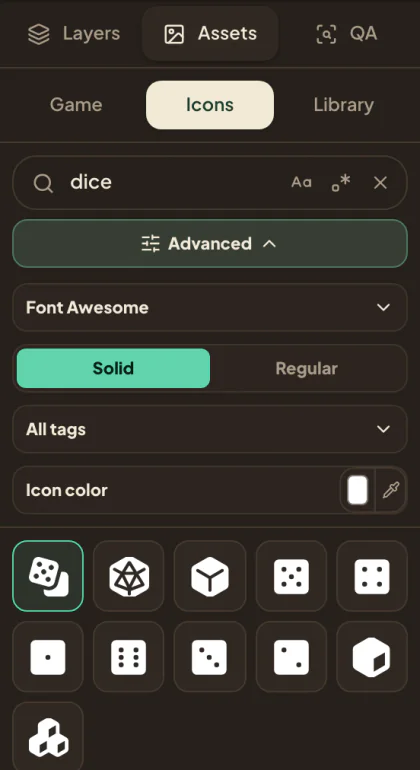
The Icons tab provides searchable symbols from Font Awesome, Phosphor, and Tabler. Search by a familiar word such as dice, arrow, or heart.
Open the advanced filters when the first results are too broad:
- Choose the icon library and one of its available styles.
- Filter by tags to narrow a large result set.
- Turn on case-sensitive or regular-expression search for precise matching.
- Choose the icon colour before inserting it.
The search field also supports style: and tag: filters. Suggestions show valid values as you type. Choose the icon library itself from the advanced filters.
An inserted icon becomes a normal image layer rather than an editable vector shape. Its chosen colour is applied as a tint, so you can change its appearance later from the layer controls. Resize, rotate, bind, group, lock, hide, and order it like another image layer.
Use the shared Library
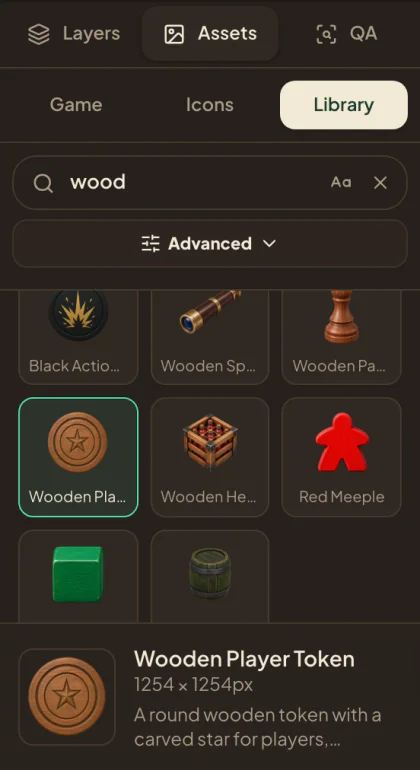
The Library contains reusable artwork prepared for Game Piece Studio. Search names and tags, then open the advanced controls to filter by category or tag; with several tags, choose Any tag or All tags. The search field also accepts category: and tag: filters. Results load in pages; choose Load more when the required item is not in the current set.
Select an item to inspect its dimensions, description, decorative status, and attribution. Double-click it, press Enter or Space, or drag it onto the piece to insert it. There is no separate Insert button.
Library assets remain linked to the exact published revision you selected. They do not consume another copy in the game's Assets library. Source, description, and attribution details stay attached to the inserted layer.
Your layer still controls its placement, crop, fit, corners, opacity, and effects inside this design. Those changes do not modify the original Library item. Saving a baked edited version creates a game-owned image for that edited result.
After inserting an asset
The inserted item appears as an image layer in Layers. Use the inspector to:
- Set an exact position and size.
- Choose Contain, Cover, or Stretch where appropriate.
- Adjust the crop and focal point.
- Add corners, opacity, tint, texture, shadow, or other effects.
- Bind the image source, size, position, or opacity to a dataset when each generated piece needs different content.
- Rename, group, lock, hide, or reorder the layer.
Dragging an item sets only its initial position. Review its physical size and crop before exporting, especially when the image will be printed.
If an asset does not load
If a source cannot load, use its Try again or Retry action. Existing results can remain visible when a later Library page or icon-provider change fails; Studio does not insert an unverified result. Wait for the requested source to finish loading before trying again.
In view-only access you can still open Assets, change sources, browse folders, search, filter, and inspect item details. You cannot upload, create folders, drag, or insert assets until you have editing access.
Studio also refuses an insertion when the current side has reached its layer limit. Remove an unnecessary layer before adding another one.
Next: Arrange the new layer precisely or bind it to game data.